11 May 2014
Out of the box Jenkins is pretty basic, some would say nothing more than a glorified cron. But that's awesome, because it's so easily customizable and fully extendable via its plugin system it doesn't need to be any more.
When setting up my Jenkins server with Ansible I wanted to provide a default set of jobs that had all the basic functionality to build various projects, create packages, etc... Everyone using this playbook to provision their VM could add extra jobs as needed, but the standard shared jobs would be ready to go. For these jobs to do anything useful though would obviously require some plugins (eg. Git, Publish over SSH and Build Name) - so how to install them?
Jenkins comes with a CLI tool you can download from each installation, and has a bunch of commands, here's a snippet of the help output...
[vagrant@vagrant-centos65]/var/lib/jenkins% java -jar ./cli.jar -s http://127.0.0.1:8080
  build
    Builds a job, and optionally waits until its completion.
  cancel-quiet-down
    Cancel the effect of the "quiet-down" command.
  clear-queue
    Clears the build queue.
  connect-node
    Reconnect to a node.
  console
    Retrieves console output of a build.
  copy-job
    Copies a job.
  create-job
    Creates a new job by reading stdin as a configuration XML file.
  create-node
    Creates a new node by reading stdin as a XML configuration.
  etc...
Thankfully there's one to install plugins, which I can easily use from an Ansible command. But running this on a clean Jenkins install you'll get an error saying the plugin you're trying to install isn't found. In fact, no plugins will be found!
The reason for this is that Jenkins fetches all the plugin information from its update center, and its that data it uses to display information about what is available. So before it's done this (ie. when you've just provisioned the instance) it won't have any of this information. I found a neat trick in a Stackoverflow (where else?) thread about how to manually do a sync of this information, which I use in my playbook just after installing Jenkins and ensuring it's running...
- name: Ensure jenkins Running
  service: name=jenkins state=started

- name: Ensure Jenkins Is Available
  wait_for: port=8080 delay=5

- name: Ensure Jenkins CLI Present
  copy: src=jenkins-cli.jar dest=/var/lib/jenkins/cli.jar
        owner=jenkins group=jenkins mode=755

- name: Ensure Jenkins Update Directory Exists
  file: path=/var/lib/jenkins/updates state=directory
        owner=jenkins group=jenkins

- name: Ensure Jenkins Update Center Synced
  shell: wget http://updates.jenkins-ci.org/update-center.json -qO- | sed '1d;$d' > /var/lib/jenkins/updates/default.json

- name: Ensure Jenkins Update Center Data Permissions
  file: path=/var/lib/jenkins/updates/default.json state=file
        owner=jenkins group=jenkins mode=644
Jenkins will then have all the information it needs about the latest plugins, and you can install away...
- name: Ensure Jenkins Plugins Installed
  shell: java -jar /var/lib/jenkins/cli.jar -s http://127.0.0.1:8080 install-plugin git xunit publish-over-ssh ws-cleanup checkstyle ansicolor rebuild jslint build-name-setter
  notify:
      - restart jenkins www
You'll need to do a restart of Jenkins for these to be available, I'm using an Ansible handler.
Finally to create the default jobs I keep the XML configuration for each versioned in my Ansible repository, then copy these in and use the CLI tool to install them.
- name: Install Job Configuration
  copy: src=.xml dest=/tmp/.xml
  with_items:
      - some-job
      - another-one

- name: Load Default Job Configuration
  shell: java -jar /var/lib/jenkins/cli.jar -s http://127.0.0.1:8080 create-job  < /tmp/.xml || true
  with_items:
      - some-job
      - another-one
Any or all of this might be complete madness of course, and there could be a much better way - so please let me know if I can make any simplifications. Otherwise, hope the information helps someone.
09 May 2014
Today I ran into some interesting behaviour with Ansible when role dependencies are skipped. Let me set the scene, so I have a route53 role which has a dependency on a java role.
# roles/route53/meta/main.yml
---
dependencies:
  - { role: java }
I also have a jenkins role which has the same dependency on java. So far so simple. I then have a role which includes both of these as dependencies...
# roles/ci-server/meta/main.yml
---
dependencies:
  - { role: route53, when: not is_dev_vm }
  - { role: jenkins }
The only interesting bit here is that when provisioning a local VM (not in EC2) it doesn't make sense to perform any Route53 tasks so the role is skipped. I just upgraded the base Vagrant box I'm using, so scrapped my old one and booted up the new version using the Ansible provisioner, only to get this error half way through...
TASK: [jenkins | Ensure jenkins Running] ********************
failed: [192.168.33.12] => {"failed": true, "item": ""}
msg: bash: /usr/bin/java: No such file or directory
WAT? jenkins requires java and there haven't been any errors so it must be installed... WAT!?!
I checked back through the output, and before my jenkins role I couldn't see any mention of java... But going back still further (and after some asking on IRC) I realised there was some related output just before my route53 role...
TASK: [java | Install Java Package] ********************
skipping: [192.168.33.12]
Aha! I dived into the docs to see if this was expected behaviour, and found this...
By default, roles can also only be added as a dependency once - if another role also lists it as a dependency it will not be run again.
So because the route53 role was skipped, and the java role was skipped, it will not be run again. Even though it's required by the jenkins role. Gotcha! I understand why this decision probably makes sense most of the time, and maybe my nesting of dependent roles is somewhat unique, but in my instance it's rather unfortunate. I'm not sure if this would be considered a bug.
My workaround is to always include the route53 role, but then do the conditional inside it.
# roles/route53/main/tasks.yml
---
- include: install.yml
  when: not is_dev_vm
And all is good again.
Update: I raised the issue on the Ansible Github project, stay tuned for the result!
https://github.com/ansible/ansible/issues/7353
30 Apr 2014
One of the projects I work on is a fairly sizeable Symfony2 application, and while it's always been deployed on Linux, until fairly recently I'd been developing it on OSX. This seems to be a fairly standard setup these days.
But I've always thought it would be nicer to be closer to the target environment. Especially when developing against and integrating with the various components the application uses. Examples of these things would be email proxies, metrics and logging backends, and search infrastructure. So I've made the move to using Vagrant, provisioned as our servers are with Ansible - and it's great!
The first downside I hit though was trying to use the Assetic --watch switch to dynamically rebuild my Js/CSS assets as I modified them. The problem I was seeing was that changes to files were regularly taking up to 30 seconds to get picked up and rebuilt, obviously too slow. This is an essential part of my workflow, I change and save very frequently so updating these manually is simply not an option.
I hunted around online for some suggestions to see if I was missing something, found a few good articles, but was already using the techniques they listed as speedups. Those being...
Use NFS for shared folders
Use opcache
Disable xdebug
Mount cache/logs to tmpfs
The next thing I tried was the new rsync support in Vagrant 1.5, but wasn't massively hopefully after reading that it didn't scale particularly well to large projects. And my problems here were twofold...
Vagrant was a little slow to sync
Permissions
The first problem was a bit off putting, but with some suggestions I thought maybe I could optimise my way around it. The permissions issue though was that the Vagrant rsync support copies files to the guest owned by the user vagrant:vagrant, and doesn't seem to be configurable. I already have a mix of users going on with my Ansible provisioning and my applications running under php-fpm. Adding another into this seemed to be quite clumsy, and when coupled to the fact that the rsync support wasn't that fast anyway, I didn't want to pursue this any further.
While I was gnashing and wrangling over all this my pal and top clever boy @BenjaminDavies had taken a look into alternative scanning/dumping solutions, with one of the top options being fswatch. It looked simple so I cloned, compiled and using an example from Stackoverflow gave it a try...
fswatch src/My/Bundle/Resources/public "app/console assetic:dump"
Turns out this is from an older version of the tool, and the current version doesn't support executing a command when changes are detected. Instead, it prints the path to the changed file to stdout. Ben sends me an updated one-liner and I paste it without blinking (my eyes beginning to bulge at this stage of rage)
fswatch src/my/Bundle/Resources/public | while read line; \
  do app/console assetic:dump; done
But editing files does nothing. FML. The problem this time was that I was running this on the host not the guest, and the database configuration details wouldn't work from here. "Database?" I hear you say, but I thought you were dumping assets? It would seem booting a Symfony application which has Doctrine configured will connect to the database on boot.
So... what now? Well I'm already a few hours of wasted time in here, so decide to create a new config environment especially for Assetic, which doesn't have any database configuration, saving this in app/config/config_assetic.yml. Even this turned out to be a lot more painful than I'd hoped, but I got there in the end.
fswatch src/My/Bundle/Resources/public | while read line; \
  do app/console assetic:dump --env=assetic; done
It was a long ride any many thanks to Ben for sticking by me during my dark moments of despair.
Using this with my NFS mounted folder in Vagrant is now acceptably fast. Though not perfect. I may have to visit a better, simpler, solution when my blood pressure returns to normal.
I'm sure there are a million better solutions to this, and I'd love to hear how other people are solving this problem. So please let me know!
29 Apr 2014
I use Jenkins to do all kinds of things, and recently I've been using parameterized builds more and more to reduce the number of jobs that I need to maintain. But when each job can do a diverse set of things (for example I have a create-rpm job which has parameters for the project to build a package for, and the repository to put it in) the build list becomes quite meaningless.
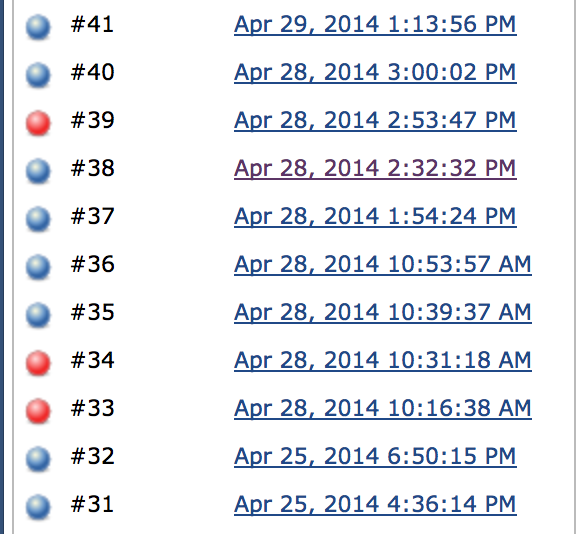
When I go back to the build it's impossible to tell which one of these was the stable build of package X that I need to refer to. I googled for options and instantly hit upon the build name plugin, which seemed to do exactly what I needed.
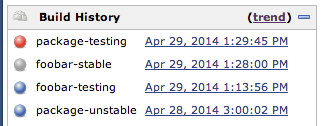
When installed the plugin adds an option to the build environment section which allows you to customize how to construct the build name, for example here's one that adds the git branch that the project was built from.

You can enter normal characters to add text, but of course more usefully you can reference dynamic variables from the build to add some more context to the name that is created.
Also, luckily for me, the plugin supports accessing the build parameters themselves, but you need to go through the environment to get at them. Here's an example from my create-rpm job where I use the name of the repository the package is being built from and the stability of the repository it's being deployed to...

It's then nice and easy to refer back to what jobs actually built, rather than being lost in the numbers.
For once, computers save the day!
27 Apr 2014
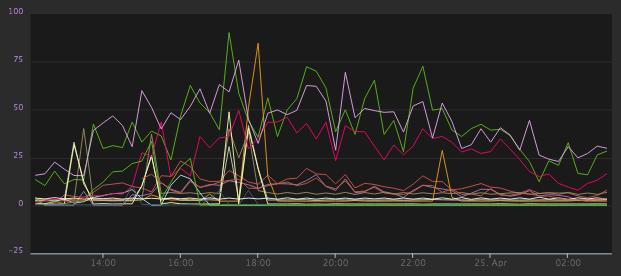
I recently tweeted a graph displaying performance data comparing old versus new infrastructure after a server move and partial upgrade. The graph is generated by Librato Metrics, a service I’ve been using for some time, and I’d like to explain a bit more about how I put this graph together using their excellent new composite metrics feature.
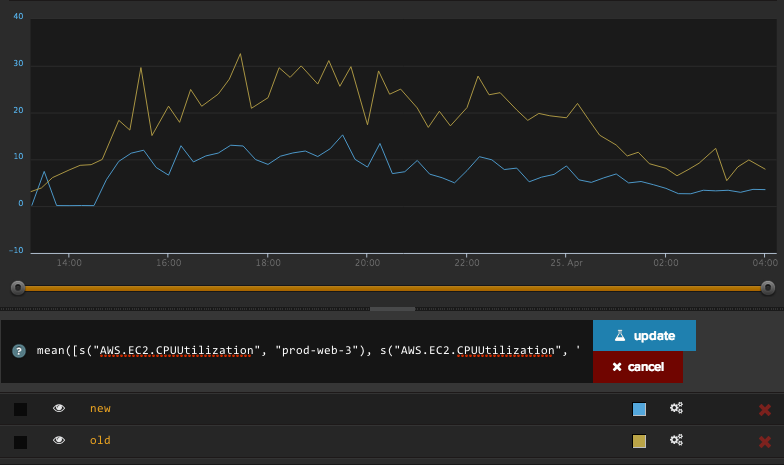
The first graph was to show mean CPU usage. I'm using the AWS integration Librato offers, and the data for this metric comes in as a single stream named AWS.EC2.CPUUtilization.
Adding this to an instrument displays a series for every server that is reporting it (some are production web servers, some batching processing, some less used test servers, etc...). But out of this myriad of sources we want to collect together just two series. Enter composite metrics.
mean(
  [
    series("AWS.EC2.CPUUtilization", "prod-web-3"),
    series("AWS.EC2.CPUUtilization", "prod-web-4"),
    // etc
  ]
)
Reading from inside out, first the series() function. This usually takes a minimum of two arguments, the name of the metric to select, and the source to select it from. You can use wildcards here to match multiple metrics/sources and they'll be combined to a single series. For example...
series("AWS.EC2.CPUUtilization", "prod-web-*")
Will select the CPU metrics for all the production web servers (the source name is just an arbitrary string by the way, this is up to you when you're pumping this data into Librato).
So in my example we select the individual metrics per-server and collect them into an array (that's the [] syntax). This array is then fed into the mean() function which outputs a single series calculating the mean of its sources. I created two of these composite metrics, one for old and one for new. And here's how it looks...
I used the same technique for a bunch of other data points I was interested in and presented them on a dashboard for sharing. The step up in functionality and usefulness this feature gives is awesome, and I'll try to show more of it in the future.